Tuesday, June 28, 2011

Organize Your Ribbon Now!


I came across this idea today while I was desperately trying to organize the storage room at work. So much stuff and absolutely no where to put it!!! What we do have, since I work at a wine shop, is wine boxes. So, I made that ^^ guy for our shipping room. Neat, huh?

These wooden boxes hold only three bottles a piece making them shallow and about a foot and a half tall. Perfect for RIBBON! or tape or gift wrap or whatever... The grooves at each end of the box will hold a 1/4" dowel in place. I cut the dowel with a HORRIBLE knife I found lurking in our employee kitchen. You should NOT do the same, as you may end up fingerless, but use a hand saw or ask your local hardware store to do the dirty work for you. After it's cut, slide the FedEx and UPS stickers onto the dowel and secure it with a piece of cork  at the opening so it can't slide out. Cork is flexible ( and also a widely available resource at work...) so it can squeeze into a tight space and secure the gap.


I plan on mounting it on the wall too. I will post a pick of that when it happens, BUT I loved it so much that I made one for my messy ribbons at home as well...


And while there is an unnecessary amount of space between the two rows, this homemade storage unite was free. And required minimal effort. I WILL, however, bust out my handy-dandy power drill one day and put a few holes in it eventually. Using a slightly too long dowel with a permanent stopper on one side, I can easily make another row. For now, I am happy with two rows.  
Now, finding wine boxes is easier than you may think. Many wine shops will sell extra boxes upon request or,   like at the shop I work at, they are sold for $5 twice a year at major wine events (our events are free!) Just ask. Lots of places are happy to get rid of them. Just be sure they have the grooves like the one shown above! Some boxes, surprisingly, do not! Then purchase your dowel at Ace or wherever... phew! If feels good to get that ribbon off the floor!!

Saturday, June 18, 2011

New Little Obsession

Lately I've been obsessed with camping. Not like the camping normal people do, more like gorgeous camping. Pretty acrylic dishes and old fashion canvas bell tents, bunting flags, hammocks and gourmet cooking. I want it all. On a budget, of course. As much as I want a WWII bell tent replica, there is no way I am about to spend close to a grand on one. Especially since reviewers say they are crazy heavy and hard to assemble. But seriously, aren't they amazing?


So, if I can't have an actual bell tent, I MUST have a tent worthy of a pretty picture, right? So I've been on the lookout for a pretty white, old fashion style tent. Maybe like this one:


At the very least, it won't be ugly bright yellow and grey and mess up my color scheme ;) Iv'e also been daydreaming about a big hammock, with a pretty, frilly trim hanging beneath a billowing mosquito net. Just the perfect place to read a book, away from all the bugs.Meep! I am working on making a detachable fringe for the sides of the hammock, just in case I want to de-girlify it for a game day bbq or something. I will also need to make matching bunting flags for the tent, I think...  

I've been getting my inspirations from this book my hubby ordered for me. He's so cute. I started talking about chickens and gardening and camping one day so he bought me a bunch of books on Amazon to surprise me. I am in love with this one:

Not only is it full of recipes on homemade marshmallows and gram crackers, it also has old world recipes like Chinese Tea Eggs (and foraging for snails for an escargot feast. Ahh!)


And my favorite part about the recipes is that it teaches you to use your dutch oven as an actual oven, by piling coals on the top of the pot, so you can make things like "campfire crumpets and scones" How fun!!

The book also has tidbits of information like this:


If you want to star gaze on your camping trip, there is a star chart, naturally

And what camping trip would be complete without a few folk tunes by the fire? Sheet music!! So cute!!


I am on a creative roll here. I am so excited to put all my ideas together and see it come to fruition on a actual trip. Ours is planed for next month on my birthday :)  I have so much to do before then!

-Jessica

Tea Time with Papier Mache

I got this lovely paper mache tutorial from Ann Wood's blog. Aren't they adorable? Mine are woodland inspired and while I originally thought I would fill the inside with glitter, I think I like how I painted the dandelions on the blue cup best.


When I first painted the cups, I wasn't sure that I liked how matte the water color dried on the newspaper so I sealed the paint with Modpodge gloss finish... After looking at them intensely, I've concluded I like the matte finish better, but I need to chill out on the excessive layering of newspaper during the actual paper mache process. More layers = sloppier surface. I feel like the light catches on all the rough edges. Especially the glitter on the inside of the teal colored one. But, practice makes perfect, I guess, so I will make more and more until they are just right!


Now, a side note on Ann Wood: I fell in love first with her amazing cake topper birds. I stumbled upon her etsy shop one day, while I was planning my January wedding and  knew instantly that I HAD to have these cuties on my wedding cake. She custom makes them out of vintage fabrics and gives them all cute unique names. I adore them. I want to fill my house with these ridiculously expensive creatures (at the time they were all made-to-order but it seems she is now selling them in various shoppes.)


These are the birdies she made for me! Greta and Marshal are their names.


Here they are happily perched atop my wedding cake. It's the small touches that make a wedding, I think. Anyway, just thought I would share. Hope you enjoy the tea cups! 

Monday, June 13, 2011

Dandelion Joy

These cute pom pom flowers from idiy are my new favorite thing. They are so freaking easy to make!! After you make the pom poms (make a bunch while you watch TV so you have a back stock) hot glue it to a long, skinny twig!
I had the idea to make a "Birthday Wishes" pom pom flower when I accidentally forgot a colleagues birthday. I don't know her that well so it would be wierd to buy her a gift, and cards always put so much pressure on me to write something sentimental... also weird. So l tied a Avery tag on with a cute ribbon and wrote a simple "Happy Birthday" on the tag, Viola! So adorable and unique! They look awesome in vases too, so the bday girl can go home and add a happy dandelion to her home.


I am keeping them in my car, in my desk at work, everywhere just in case I'm caught off guard by my neighbor or the barista at Starbucks who always make me a perfect latte. I hope you love them too!!

Sunday, June 12, 2011

Thrift Store Magic!

Now these mason jars were collected over the last few weeks for about $.99 a jar... and then I tinted them blue to resemble the vintage ones that cost like 12 bucks each. These guys, however, cost me about $1.50 a piece including the glass tint! I found the diy at bridal buzz and found all the supplies at Michaels.


So, I made a mistake with the first few by painting both the inside and outside with the tint... it comes out really blue. I want them to have a softer aqua color. By painting only the outside (like the tutorial says but I managed to forget that part) they look a lot better. I used a fan brush like she did but I think I will try using a sponge brush the next time around because some parts look really streaky, and I am afraid they wont fade when I bake them.. I will post an update after I bake them and test out the sponge idea. Cheers! 

Thursday, June 2, 2011

Pretty Clothespins!

There are a lot of tutorials about making clothespins into chic, decorative and organizational items but, here are my inspirations for YOU! And, it cost me about $4. I only needed to purchase the clothespins! Now, if you're a novice crafter, you may need to invest a bit more, however, once you accumulate the basics, crafts like these are basically free.

So, my initial inspiration was from Whisker Graphics via iDiy


I bought my own washi tape from a crafty store in Bellingham and attempted this project... but I found that the tape didn't stick to the low quality wood of the clothespins. :( SO I switched gears and used other materials that would take the heat of a glue gun. I did manage to make a few cute pins from the washi tape, however. I ended up removing the spring so the tape would wrap around the face of the pin and, at the very least look clean and fresh... if my tape had been a bit bit thinner, it would have looked as awesome as hers ^^ To add my own personal flare, I added cute glittery-gold alpha stickers... a "J" for Jessica. Me.  

My favorite and easiest (and cheapest) material was ribbon I bought from the dollar bin at Target. 3/8" wide + six different coordinating ribbons all for one dollar??? Seriously?! I hot glued the ribbon, then cut the length equal to that of the clothespin. Voila! And it took all of five minutes.
Next I used fabric:


I had some scrap fabric that had conveniently been reinforced by interfacing material that worked perfectly. It had the structure it needed to apply it with ease and it was immune to annoying fraying. Now, applying the interfacing material is the most annoying part of any sewing project, so if you would rather save yourself from early crafters fatigue, I fully support skipping this step. They only take a few minutes to make, so if it frays, make another one. Easy peasy. All I did, was hot glue the fabric, un-cut, to the clothespin, lining up only the far edge. After the glue sets, use regular sewing scissors to cut the fabric to the perfect size. Don't bother pre-cutting the pieces to fit the clothespins because chances are, you will end up using the scissors to clean up the edges anyway... save yourself a step and skip the measuring!

I also dabbled in scrapbooking paper...


AND my favorite that were inspired by office and school supplies...

At first, I tried to stamp directly on the wood but the ink bled within seconds. I used note cards to cover the surface with, which were a tad short to use vertically so I used a dye-cut heart stamp to finish off the edge, then I used mini alphabet stamps to make "Notes", "Important" and "Bills". Keep your life organized and cute. I then extended the alphabet stamps to include "Thanks!" and made a cute card-pencil gift! Voila! You could stamp "Happy Birthday" "Congrats" or whatever fits the occasion. 


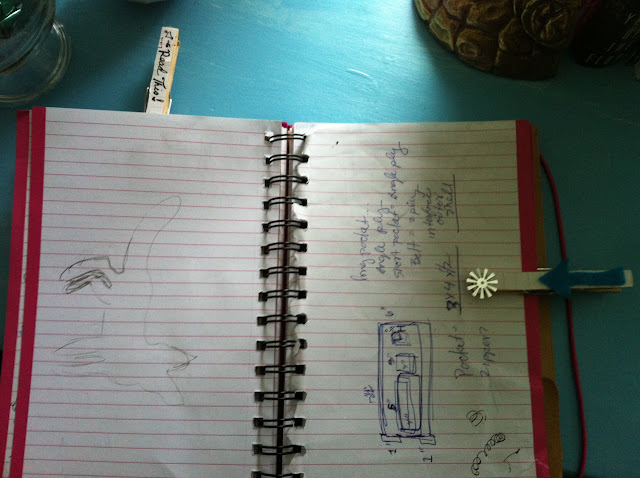
The "Study" inspired pins featured the same notecard veneer and turquoise felt to make an arrow and a heart! They can be used to designate places in textbooks and notes that are worthy of a revisit! How Cute! Bookmarks!


a few more inspirational shots...

keep all your fabric pieces organized!! 


 Display your random photos and papers...


 Organize your mail...


The possibilities are endless, really... Have fun guys!! 

Materials 

*Clothespins
*Ribbon
*Fabric
*Scissors
*Washi tape
*Hot glue
*Mini pom-poms
*Scrapbook paper
*Glitter? fabric flowers? B&W Photos? Indulge yourself!!