Supplies:
1. belt sander
2. 100 grit belt for stripping
3. 250 grit belt for finishing and smoothing
4.2 quarts high-gloss, self priming paint in different colors
5. high quality paint brushes in various sizes
6. FrogTape
7. 1 quart water-based Polyurethane in desired finish (I used satin but you can use a higher gloss if you want)
8. Martha Stewart Specialty Finish in Gold Pearl
Now, this chevron business was so much harder than I imagined it would be. Or maybe I just suck at math and measuring but be warned: This will require a fair amount of planning as far as where you chevrons will go and how wide they will be.
I started out by sanding my table with a belt sander. I originally thought the belt sander would strip the wood clean of all the previous paint and leave me with a perfectly bare table to work with. I was wrong. That may have to do with the fine grain of the sand paper we used. We probably needed a rougher grit to start.


Next I, wiped the table down thoroughly removing any dust, then painted the whole table white, leaving the legs in their natural wood stain. This took about 4 coats of paint before I achieved a nice, even cover.


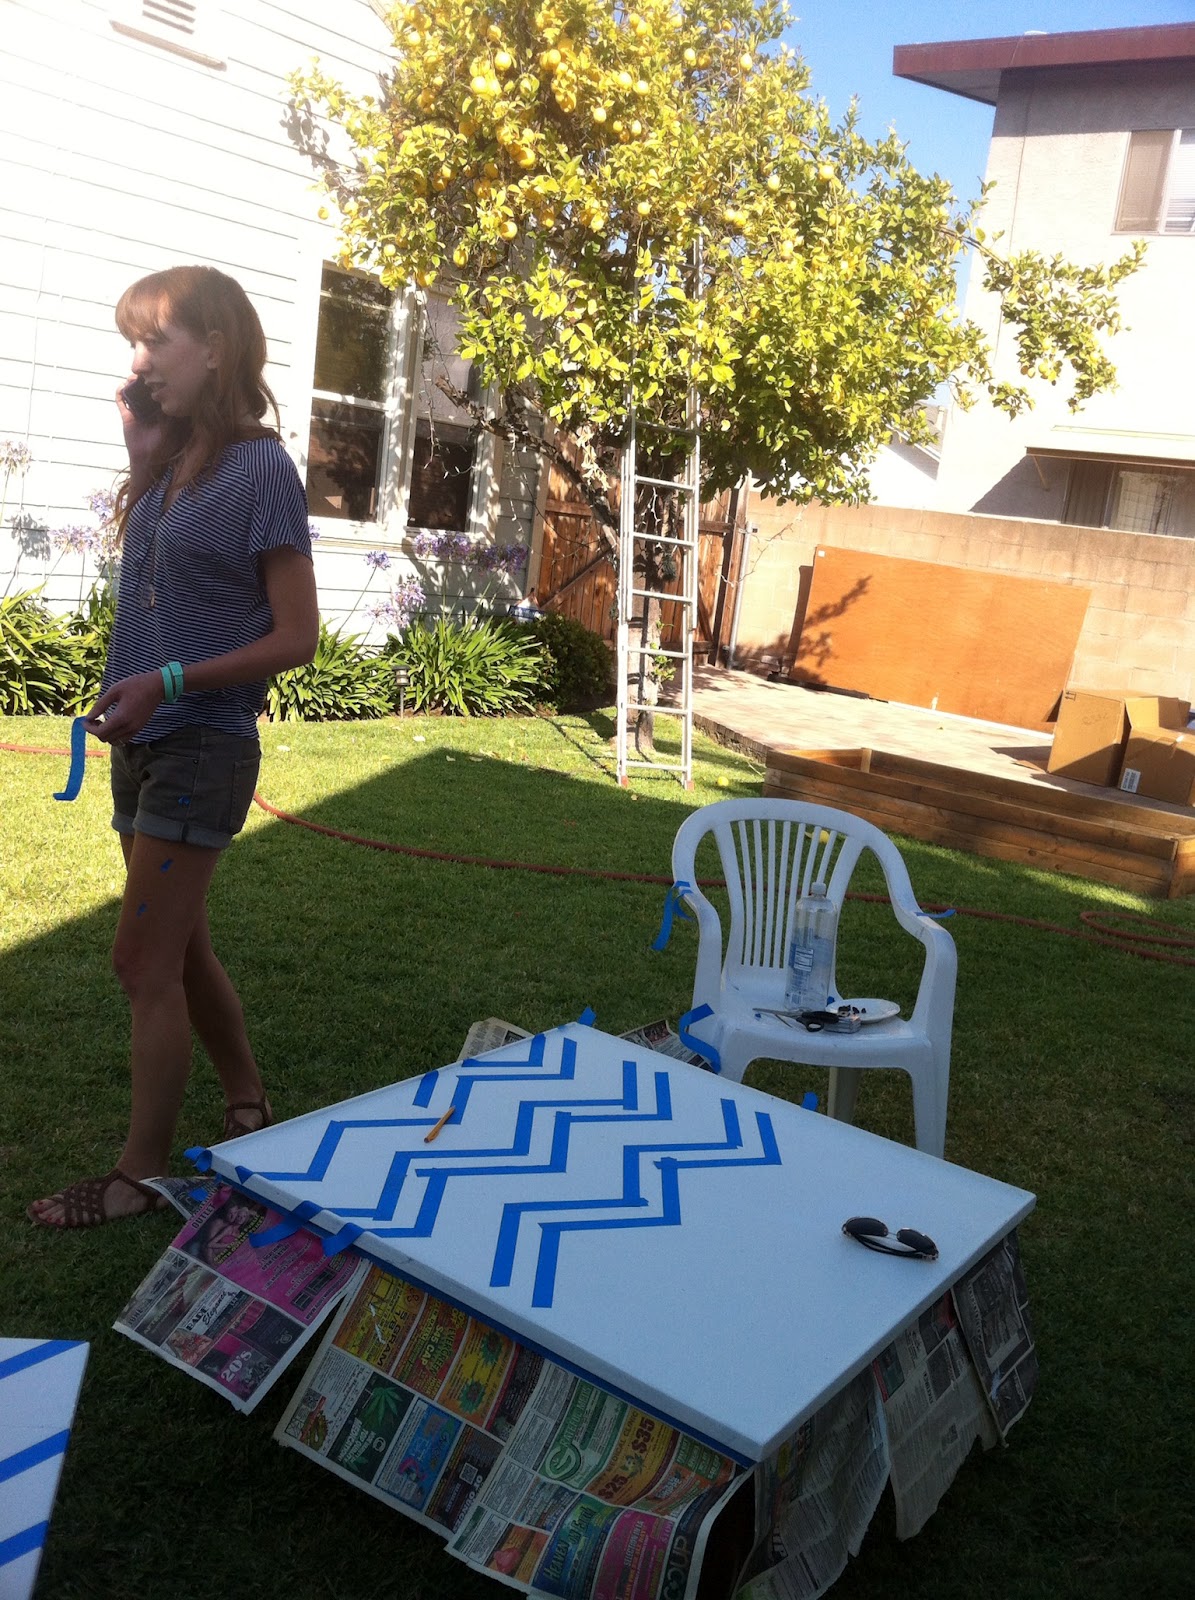
Now it's time to map out your chevrons! I decided mine were going to be 4" thick and 12" from tip to tip. I made a grid of dots first by measuring the length and adding a dot every 4" along the very edge of the table and repeated on both edges. Then I measured the width, lining up the tape measure with the first set of 4" marks and then adding a dot at 12", then 24" then 36". Then I repeated this step throughout the length of the table. Then, to assure I was measuring properly, I drew in the lines of the chevron and it looked pretty good!
Now you tape. Take caution when forming your peaks taking note where you will be painting and where you need to trim the tape to make perfect points. We used regular old blue painters tape but YOU should use FrogTape (its green!) because it prevents the paint from bleeding (it WILL bleed and you WILL have to go back and fix it) so use the green FrogTape! Paint a few, thin coats until you achieve full coverage ,then peel the tape off slowly


Don't forget to peel the tape off before the paint dries because it will rip the paint off the table and it will look horrible.
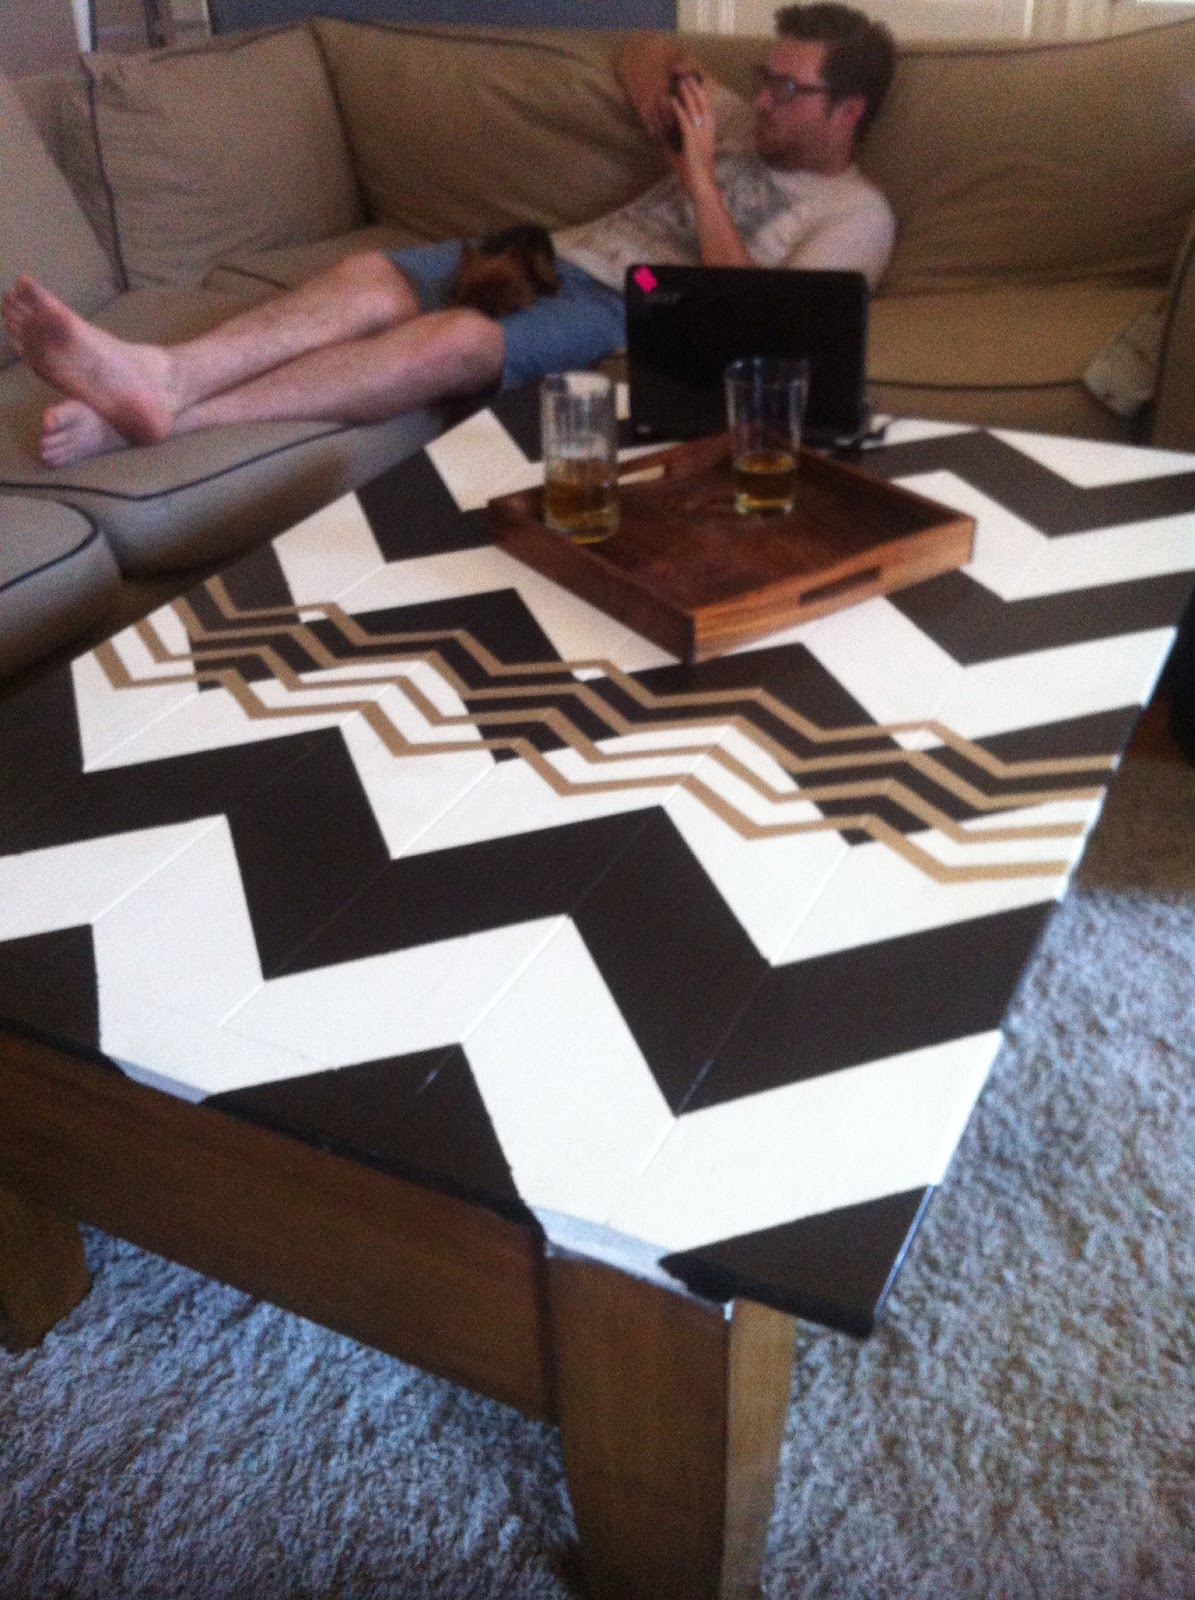
Wait for this to dry completely! Now you can stop here and apply your polyurethane sealer and be done with it! But I felt like I needed a bit more to make it look perfect. I had the idea when I came across this gold finish paint by Martha Stewart. I wanted to add a few more chevrons, much thinner, a bit wider and condensed into a 15" strip... here is what I came up with: